
Additional documentation for Altherma 3 integration with Home Hub:
Installer Reference Guide for Daikin Home Hub (German)
Installer Reference Guide for Daikin Home Hub (English)
Connecting the Daikin heat pump to the BEAAM
There are 2 ways to connect the heat pump to the BEAAM using a LAN network cable.
Option 1: Connection via the BEAAM LAN port
This is the recommended option, since in this case the heat pump is assigned an IP address by the BEAAM. Make sure the heat pump is configured to obtain an IP address via DHCP. The necessary settings can be found in the heat pump's documentation.
However, this option is not always possible at the customer's site, since direct LAN cabling between the heat pump and the BEAAM may not be feasible.
Option 2: Indirect connection via the BEAAM WAN port
To do this, connect the heat pump to the router or a switch on the customer's LAN network. Since the BEAAM is also connected to the customer's LAN network via its WAN port, the heat pump is reachable from the BEAAM this way.
Recommendation:
The IP address should be configured directly on the heat pump. Make sure the IP address is not within the DHCP address range configured on the router and that it is in the same subnet as the entire customer LAN.
Alternative:
The IP address for the heat pump can also be assigned via DHCP by the customer's router. In this case, make sure the router always assigns the same IP address to the heat pump. On most router models, this can be configured per assigned IP address.
ATTENTION:
If changes are made to the customer's LAN (for example, a new router), with Option 2 the heat pump's IP address and the configuration in neoom CONNECT must be updated.
Configuration in neoom CONNECT
Step 1: Log in at connect.neoom.com
Step 2: Select the site and click "Site Configuration" in the left-hand navigation bar.
Step 3: Click "Scan network" to add a new device.
After a few seconds, a list of all devices found on the network will appear.
If the heat pump has been correctly cabled to the BEAAM and is correctly configured on the network, you will find it in this list.
Step 4: On the heat pump tile, click "Configure".
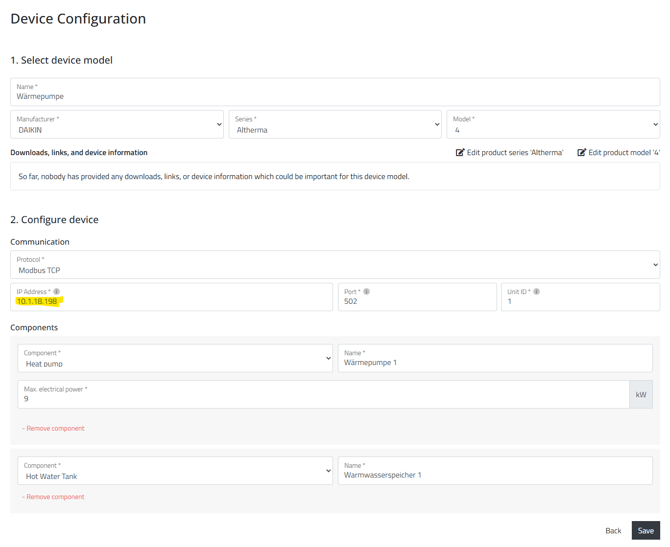
Step 4: Fill in the data as shown below and click Save. Please make sure to select the correct model (Altherma 3 or Altherma 4). The IP address field is already pre-filled and must not be changed.
Step 5: Click "Apply configuration".
Step 6:
After the configuration has been loaded onto the BEAAM, the heat pump should appear as online (green dot) in the device overview after a few seconds to a few minutes. To check this, click "Devices" in the left-hand menu.
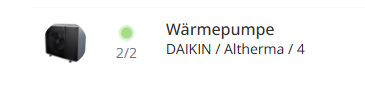
Once the device is online, click on it to view the measured values transmitted by the heat pump:
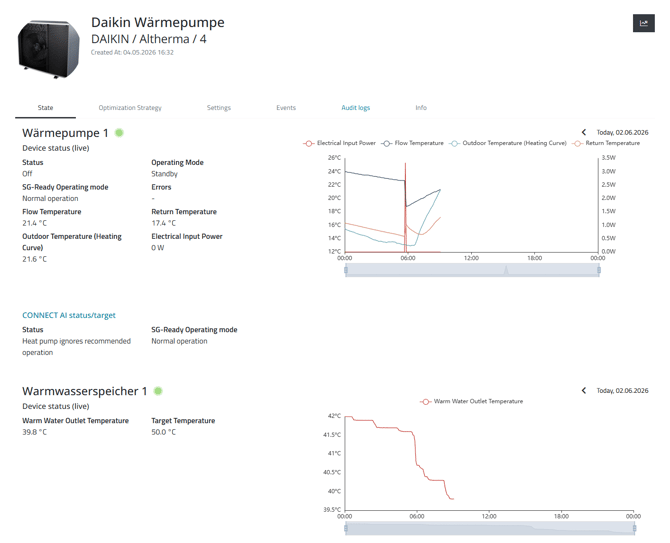
Required settings for Daikin Altherma 4 in connect.neoom.com:
Unlike the Altherma 3 with Home Hub, the Altherma 4 does not currently support the energy management system sending a power value (available PV surplus) to the heat pump. For this reason, the following additional configuration must be carried out for an Altherma 4 installation:
In connect.neoom.com, click "Devices" in the left-hand navigation bar, select the heat pump from the list, and then click the "Optimization Strategy" tab.
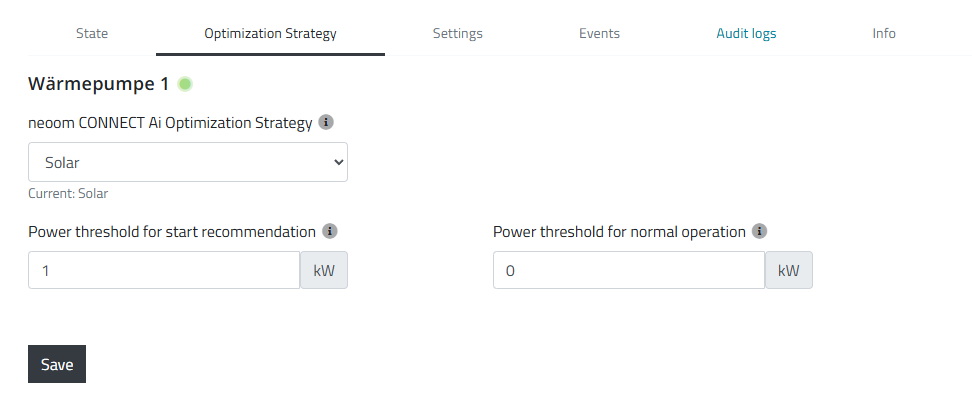
Power threshold for start recommendation:
From this power value of available PV surplus onward, the energy management system signals a switch-on recommendation to the heat pump.
This value should be sized according to the size of the PV system (kWp value), so that the specified PV surplus power value is reached on typical days. However, it should not be set too low, since the heat pump requires a certain minimum power value in order to start up.
Power threshold for normal operation:
This value is not relevant for Daikin heat pumps and should be set to 0.