
1. Requirements and preparations
Please check that the following requirements are met before proceeding to step 2.
- You have a fully configured, fully functional Fronius storage system that is already in operation, consisting of a Fronius Gen24 Plus hybrid inverter and a BYD or Fronius Reserva battery
- You have the BEAAM Energy Manager package. This includes:
- BEAAM Energy Manager
- Power supply unit
- BEAAM activation code
- Login credentials (login e-mail address and password) for Fronius Solar.web for the Fronius system in question (solarweb.com)
- A basic understanding of LAN, IP addresses, etc.
Recommendation for preparation:
The Fronius system must have the latest software installed.
Since a software update on Fronius systems can take several hours, it is advisable to have the customer carry this out before your arrival in order to save time.
You can find out how to perform the update >>here<< (steps 3 and 4).
2. Setting up, wiring and switching on the BEAAM Energy Manager
You can choose any location for your BEAAM Energy Manager. Make sure there is a power outlet and a LAN connection nearby. The BEAAM does not support Wi-Fi in order to guarantee a high connection quality.
It is not necessary to place the BEAAM Energy Manager near the storage system.
- Connect one end of the supplied LAN cable to the "WAN" port on the BEAAM and the other end
- either to a network socket in the customer's house that gives you access to the home LAN
- or directly to a LAN port on your internet router. It does not matter whether you plug the cable into the LAN1 or LAN2 port or a port with a different LAN number.
Important: The WAN port of your internet router must not be used for this!
Ports on the BEAAM Energy Manager: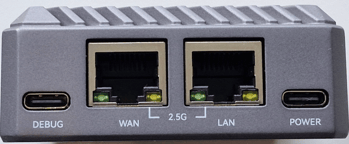
Ports on the internet router (example illustration):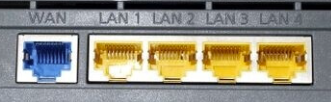
- Connect the supplied power adapter to the "POWER" port
IMPORTANT:
Always connect the WAN port on the BEAAM to a LAN port on the internet router. Please be careful not to mix up the WAN and LAN ports here!
A few seconds after the BEAAM is supplied with power, the left LED on the BEAAM's WAN port should start to light up and the right LED should blink occasionally and irregularly.
3. Preparing the Fronius storage system
We recommend carrying out the configuration steps on a laptop or tablet rather than on a smartphone, as the pages are often displayed in a cluttered way on smartphones.
In this section, we explain which configuration changes you need to make on your storage system, how to bring the Fronius system up to the latest software version, and the easiest way to find the IP address of the Fronius inverter so that you can then set it up in the neoom BEAAM.
- Go to solarweb.com and log in with your Fronius login credentials.
If you do not have a Fronius technician account, ask the customer to log in with their credentials. - After you have successfully logged in, you should see a page similar to the following:
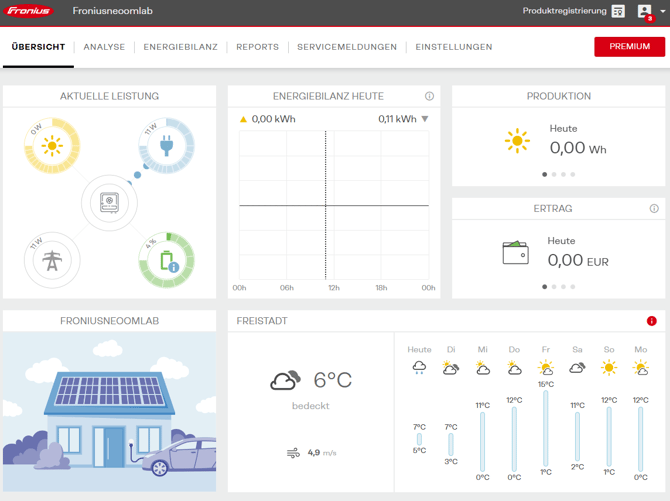
On this page, click on "SETTINGS" (top right) "EINSTELLUNGEN" and then on "COMPONENTS" (also in the menu ribbon at the top). - You should now see a page similar to the following:
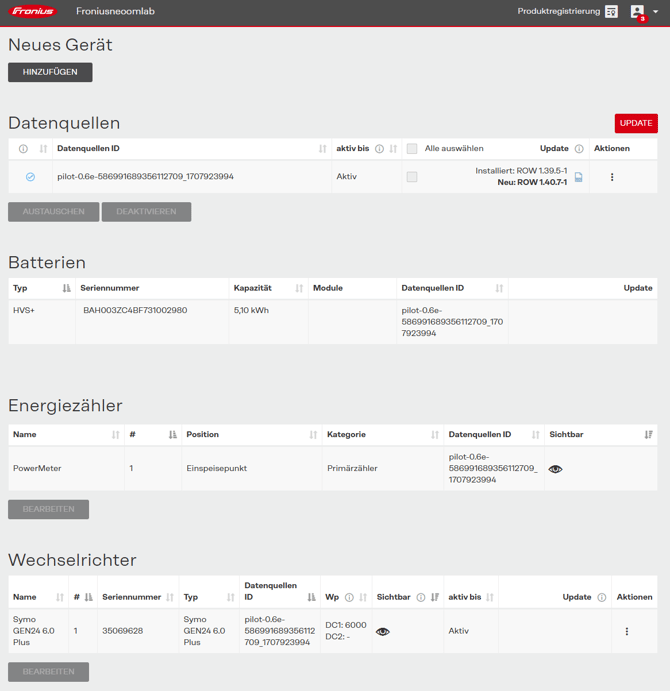
- Check whether updates are available for your components.
The page shows you whether updates are available for your components.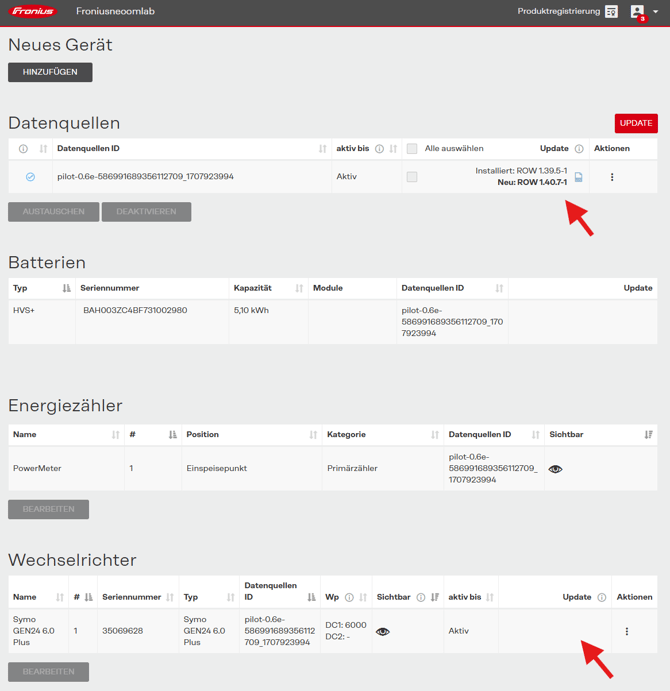
Carry out all available updates first before proceeding to the next step.
Example of how to carry out an update: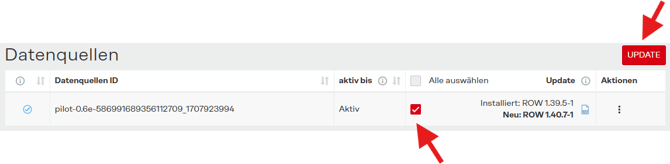
- Once all updates have been carried out successfully, click on the "3-dot menu" next to the inverter and then on "Device settings".
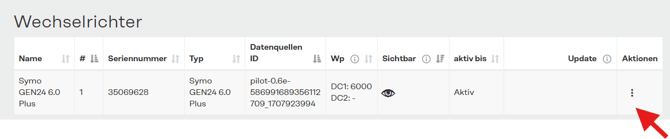

- The following window should now open:
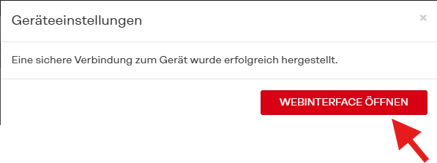
Click on "OPEN WEB INTERFACE" here. - You should now see a page similar to the following:
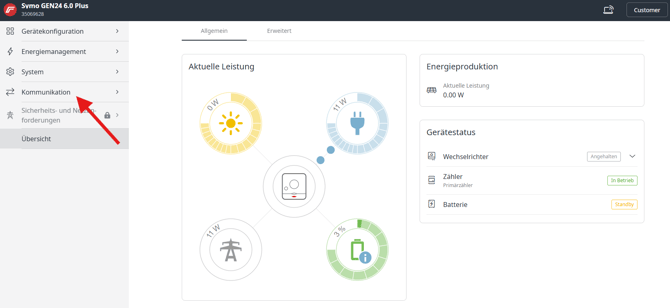
Click on "Communication" here and then on "Modbus".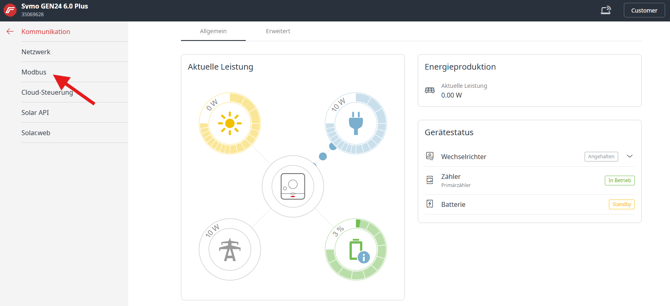
- On this page, set the parameters as follows:
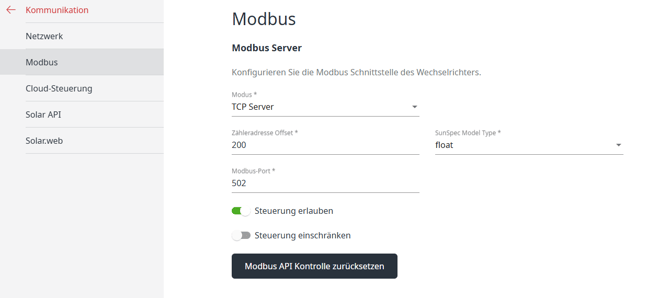
and then click "Save" in the window that appears at the bottom of the screen.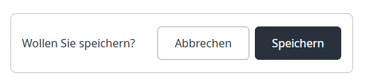
4. Creating a neoom site and setting up the Fronius storage system in neoom CONNECT
- Go to connect.neoom.com and log in with your neoom Power Partner user ID (e-mail address).
- Click on
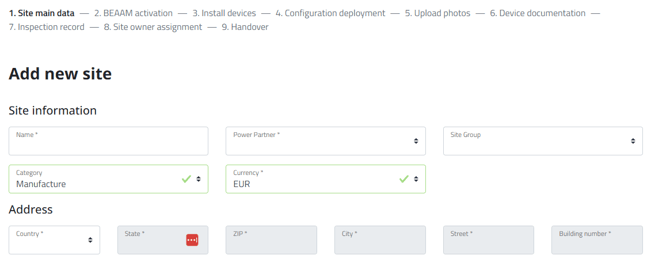
- Fill in the fields and click "Save".
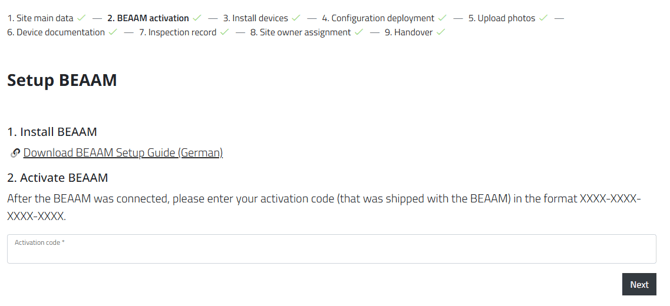
- On the page that now appears, enter the BEAAM activation code and click "Next". You will find the BEAAM activation code in the BEAAM box.
If the BEAAM activation is successful, you should see the following message: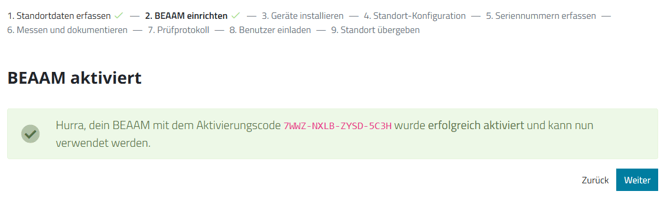
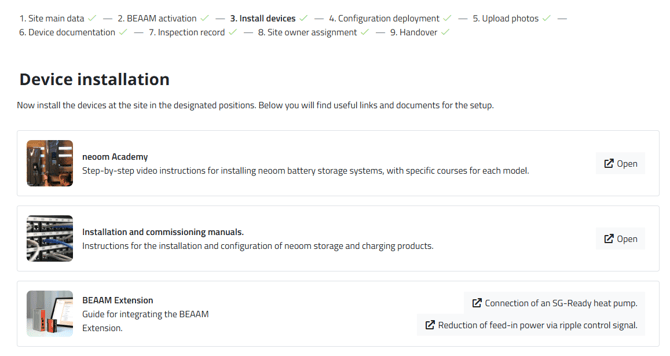
- Since you are currently reading the guide for installing a BEAAM Energy Manager with a Fronius storage system, which is also linked on the following screen, you can simply click "Next" on this page.
- On the following page, click on "Scan network".
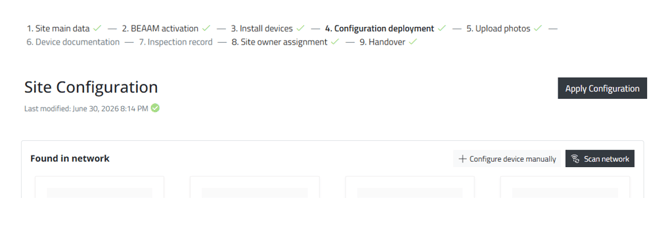
After a few seconds all devices found on the network shall be listed.
Search for the fronius inverter and press "Configure" - On the following page, in the section "1. Select device model", choose the settings as shown in the image. The name can be chosen freely.

- In the section "2. Configure device", fill in the data as follows:
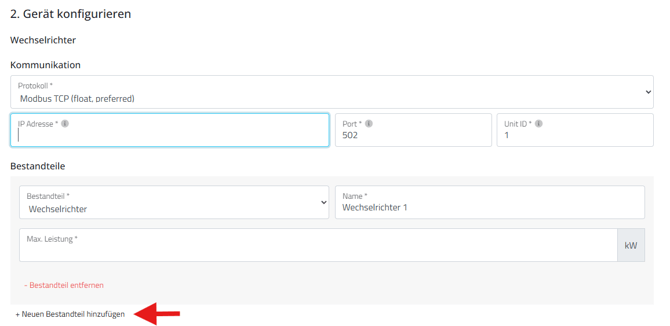
The IP Address field should be already pre-filled.
Add the correct rated inverter power of the installed Fronius GEN24 in kW.
Then click on "+ Add new component" (see red arrow in the image above). - In the newly displayed, grey-highlighted field, select the component "Battery".
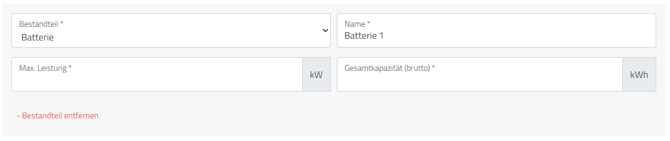
Add the maximum battery power in kW as well as the gross total capacity of the installed battery in kWh.
If a PV system is installed at the site and connected to the Fronius inverter, click on "+ Add new component" again and continue with the next step. Otherwise, skip the next step. - In the newly displayed, grey-highlighted field, select the component "PV".
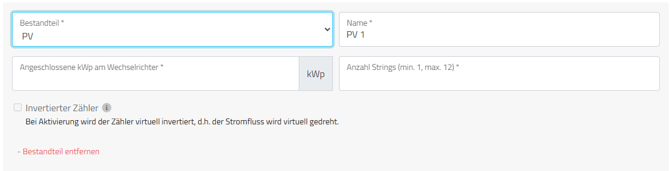
Add the kWp value as well as the number of strings connected to the inverter. - In the "Grid meter" section, select the protocol "Modbus TCP".
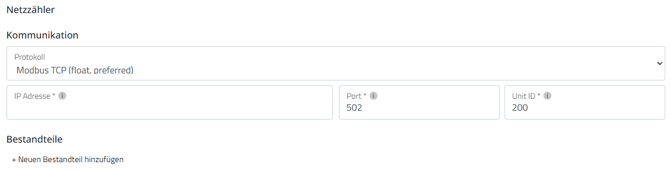
In case the IP address in not already prefilled, the same Address as for the inverter (see above) hast to be entered.
Important: The Unit ID must be identical to the "Meter address offset" value that you previously set in Fronius Solar.web under the Modbus settings.See section 3.8of this article.
In the grid meter section, click on "+ Add new component". - In the newly displayed, grey-highlighted field, select the component "Electricity meter AC".
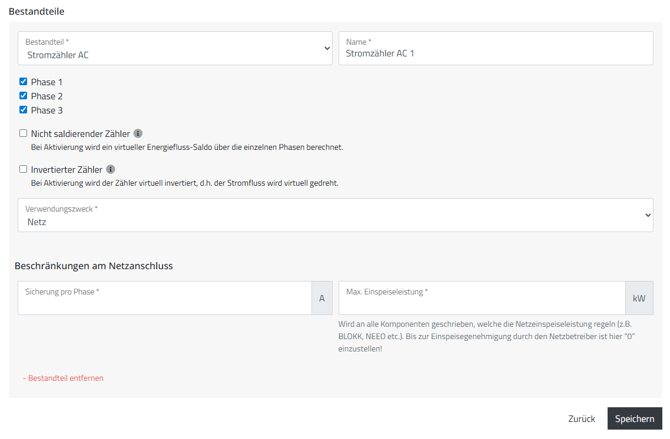
Select the purpose "Grid" and enter the value of the grid connection fuse in amperes as well as the maximum feed-in power in kW permitted by the grid operator.
Then click "Save". - On the page that now appears, click on "Apply configuration".
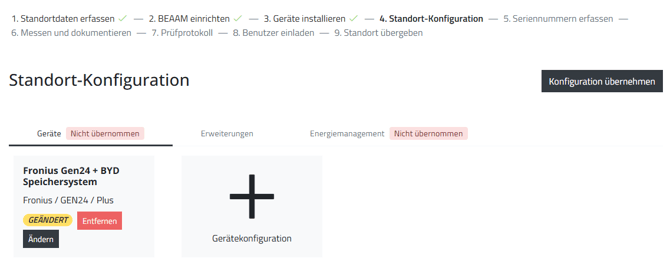
- On the page that now appears, click "No neoom devices are being installed".
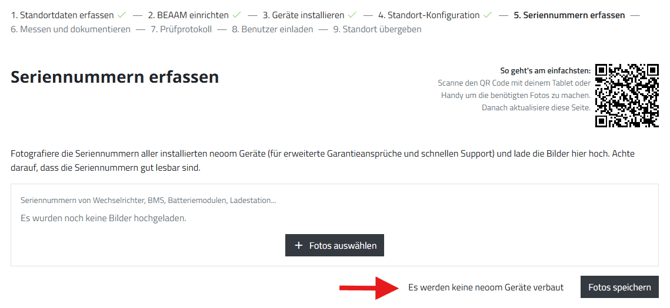
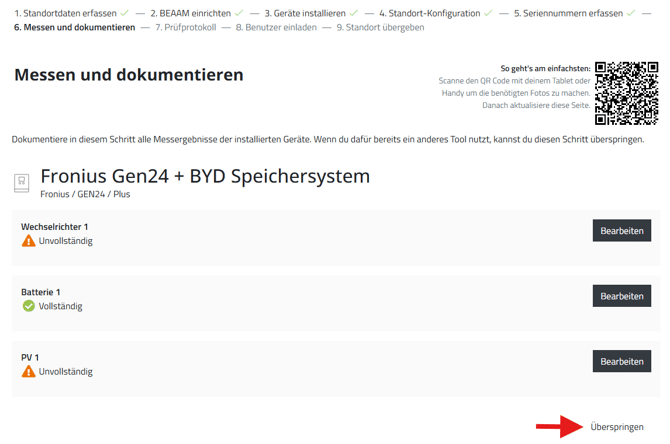
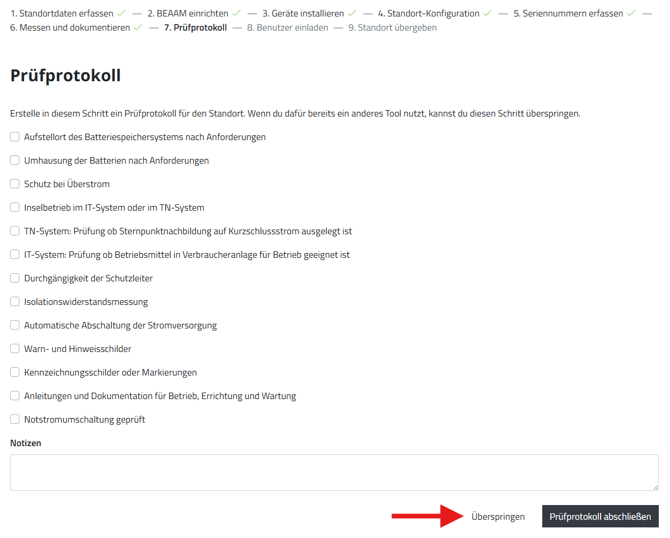
- Since this is an inverter/storage system that has already been installed and commissioned, no measurement and documentation is required, and you can skip the two pages that now appear:
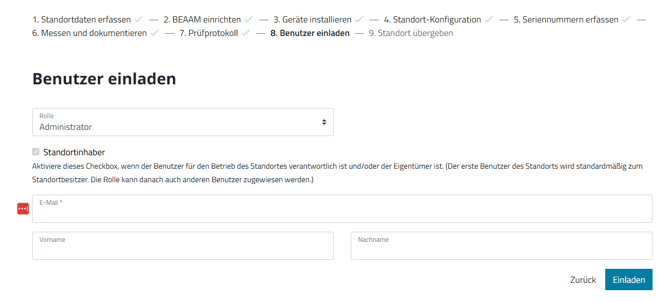
- Now invite the customer as a user and site owner of the neoom BEAAM Energy Manager site by entering the customer's e-mail address and name.
- Ask the customer to download the neoom app from the app store. The easiest way to do this is for the customer to scan the QR code that now appears.
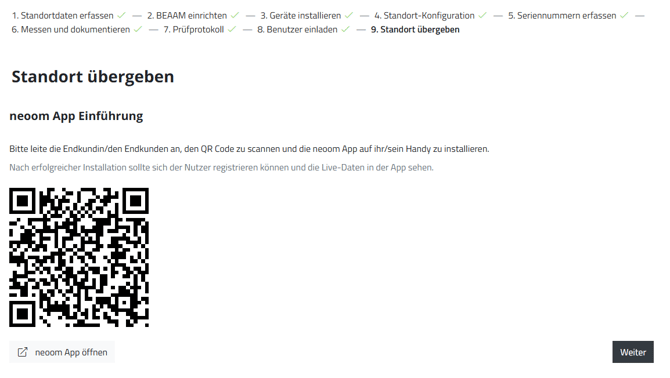
- The customer needs a neoom subscription to be able to use the BEAAM Energy Manager with their Fronius storage system.
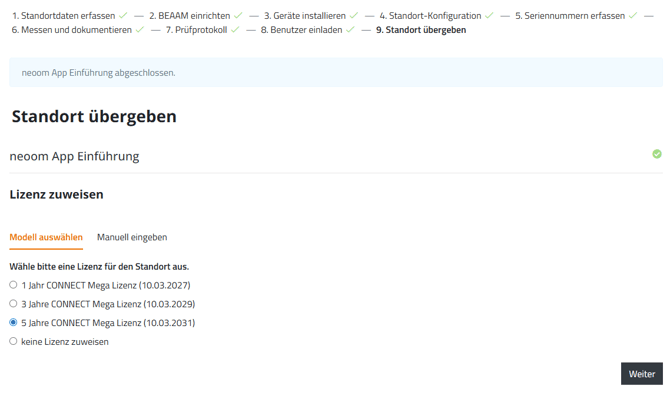
On the following page, you can assign the customer a license (1, 3 or 5-year license) that you have purchased from neoom in advance.
Alternatively, you can select "Do not assign a license" and the customer can purchase the license themselves via the app using a credit card.
If you want to assign the customer a specific license code that you have purchased from neoom, select "Enter manually" to enter this license code. - On the page that now appears, click on "Hand over site".
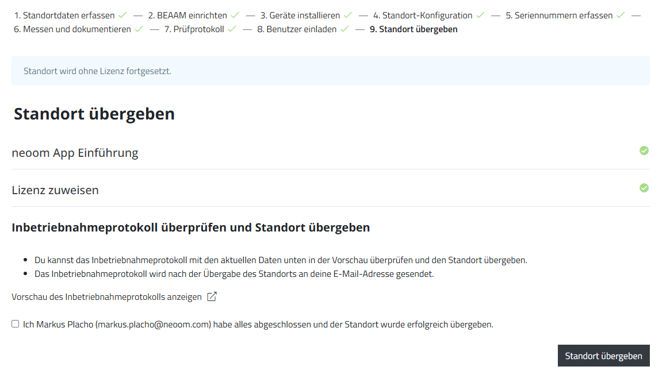
- The overview page of the newly created BEAAM Energy Manager site will now be displayed.
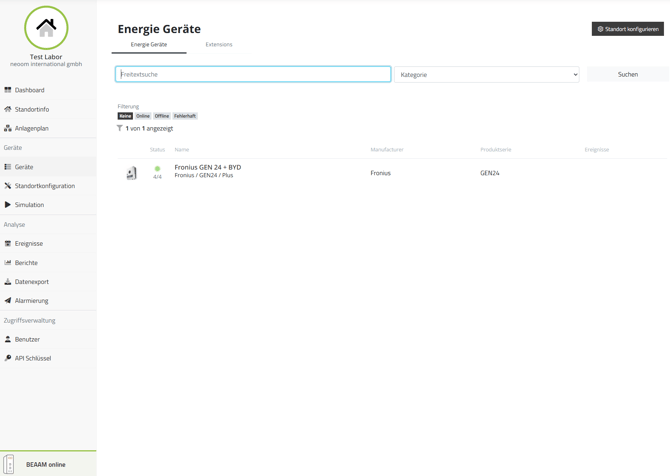
- Here, at the bottom left of the screen, you should see the information "BEAAM online":
- Now check whether the Fronius storage system is being detected by the BEAAM Energy Manager.
To do this, click on "Devices" in the side menu on the left.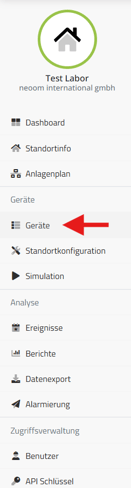
and check whether the status indicator is green for all components configured earlier.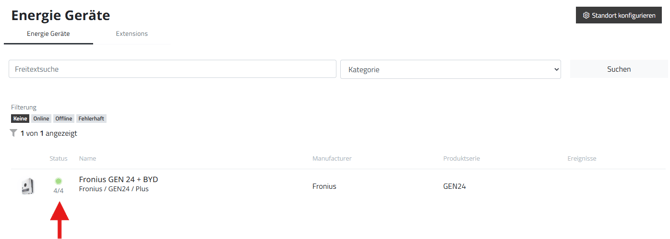
- If everything is shown in green and the battery system is switched on, you can already see the first data that the BEAAM is receiving from the Fronius system in the dashboard.
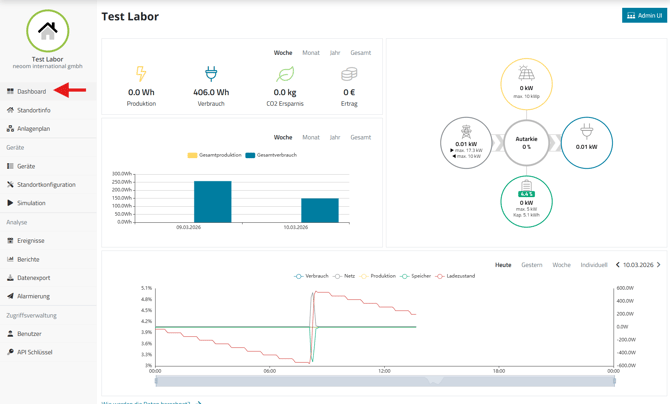
- In the meantime, the customer should also have installed the neoom app and logged in.
Ask the customer to open the app on their device and explain the functions to them as described in the following chapter.
5. Further information
In case you also have a Fronius Wattpilot EV charging station, please follow the instruction to connect it to neoom Ai.
Integrating the Fronius Wattpilot: https://wissen.neoom.com/fronius-wattpilot-einbinden
6. Troubleshooting
- Error codes of the Fronius inverter that may be displayed in neoom CONNECT:
https://www.fronius.com/de/solarenergie/eigenheim/kontakt/support-fuer-pv-anlagenbesitzer-eigenheim/support-state-codes-gen24 - The neoom BEAAM LED does not light up after the network cable has been connected.
- After completing the configuration of the Fronius storage system in CONNECT:
- the BEAAM is not shown as online
- the Fronius storage system is not shown as online